How to connect to the University of Tsukuba VPN Services
using the OpenVPN protocol
Here we will explain how to make a VPN connection to the
University of Tsukuba VPN Services using OpenVPN Client by
OpenVPN Technologies, Inc.
A VPN connection method easier than OpenVPN
We recommend you using OpenVPN when VPN connections
cannot be made using SoftEther VPN Client and L2TP/IPsec.
- SoftEther VPN Client
is easy to use with Windows
If you are using Windows, then connections will be more
stable, faster and easier using SoftEther VPN Client.
- L2TP/IPsec is easy to use
with Mac, iOS and Android
Since L2TP/IPsec VPN Client is attached to OS like
Windows, Mac, iOS, Android by default, the initial VPN
connection settings can be made relatively easier
compared to methods using OpenVPN. For that reason, we
recommend you try using L2TP/IPsec first, before using
OpenVPN. Some network environment and firewalls will
block the L2TP/IPsec communications. In those cases,
please try using OpenVPN.
Select the OS
How to set on Windows (OpenVPN)
Here we will explain how to make a VPN connection by
installing OpenVPN Client by
OpenVPN Technologies, Inc. in Windows XP, 7, 8, Server
2003, 2008 and 2012.
On this page, we will explain using the Windows 7 screen
as an example. The basic setting methods on OS like Windows
XP, Windows 8 or later are the same, however, some
operations are slightly different.
1. Install OpenVPN Client (Only once the first time)
Install the OpenVPN software published as an open source
by OpenVPN Technologies, Inc.
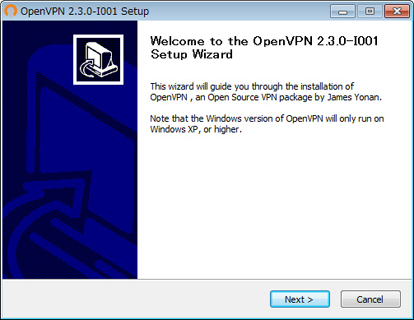
Double-click and run the downloaded OpenVPN program file.
After the Setup Wizard is displayed, install according to
the instructions on the screen.
2. Download and install the connection setting file (.ovpn
file) (Only once the first time)
In order to use OpenVPN Client, you need to download the
connection setting file (.ovpn file) required to connect
with the University of Tsukuba VPN Services.
Please click on the connection setting file (.ovpn file)
links below and download.
|
Item |
Value |
Notes |
|
Setting files using UDP |
Download the setting file:
 campus-vpn-udp.ovpn
 |
UDP is recommended as it is fast. |
|
Setting files using TCP |
Download the setting file:
campus-vpn-tcp.ovpn |
Please give TCP a try if UDP communications cannot
be made due to restrictions in the firewall and NAT
of your home or business trip destination
environment. |
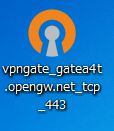
If you save the connection setting file (.ovpn) onto the
desktop, an OpenVPN icon will be displayed as follows.
However, double-clicking on this file will only activate the
Notepad, and VPN connections will not be made.
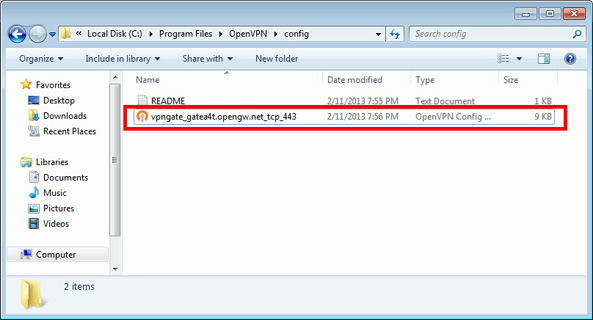
You are required to install the downloaded connection
setting file (.ovpn) in the OpenVPN config folder.
Open the "C:\Program Files\OpenVPN\config"
folder and copy or move the .ovpn file you downloaded onto
this folder.
3. VPN Connection
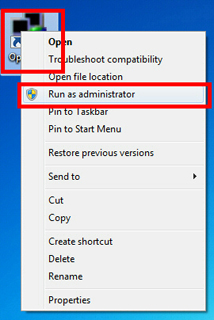
Right-click the "OpenVPN GUI" icon on
the desktop and click "Run as administrator."
Please be careful if after clicking "Run as administrator"
on Windows Vista or later versions and it does not run, VPN
communications will not be possible.
After activating OpenVPN GUI, the OpenVPN GUI icon will
be displayed in the screen's bottom right task tray.
(If the icon does not display, it may be hidden. If you
click on the arrow icon pointing upwards, the hidden icon
will be displayed).
Please right-click on the OpenVPN GUI icon and click
"Connect."

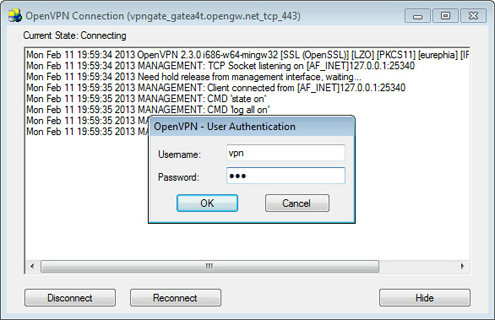
The VPN connection will start. The connection status will
be displayed on the screen.
When a screen to enter your user name and password is
displayed, enter the fields as follows.
|
Item |
Value |
Notes |
|
User Name (Account) |
University of Tsukuba Unified Authentication
System ID
(the 13 digit bar code number on the back
of the student/staff ID card) |
Please
click
here for information on the Unified
Authentication System. |
|
Password |
Password for the University of Tsukuba
Unified Authentication System |
Confirm that the current password and ID are
correct. |
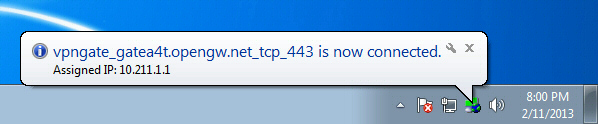
When the VPN connection has been successful, the
following notification will be displayed.
How to set on Mac (OpenVPN)
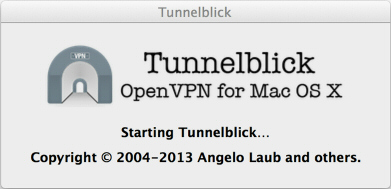
Here we will explain how to make a VPN connection by
installing
"Tunnelblick,"
the GUI version of OpenVPN Client by
OpenVPN Technologies, Inc.
in Mac OS X.
On this page, we will explain using the Mac OS X Mountain
Lion screen as an example. The basic setting methods are the
same as with other versions, however, some operations are
slightly different.
The screen shots below are all taken from the English
version of Mac OS X. When using Mac OS X with other
languages, a different language than that of these screen
shots will be displayed. Even in such cases, by reading the
following explanations, you should be able to make the
settings easily.
- Since setting OpenVPN in Mac is difficult, we
recommend that you first try the method
using L2TP/IPsec.
In cases that L2TP/IPsec cannot be used due to reasons
such as strict firewalls etc., please try OpenVPN.
1. Install Tunnelblick (Only once the first time)
Download and install Tunnelblick from the following URL.
Please try to make sure you are using the latest version
(the beta version if there is a beta version).
Install according to the instructions on the screen.
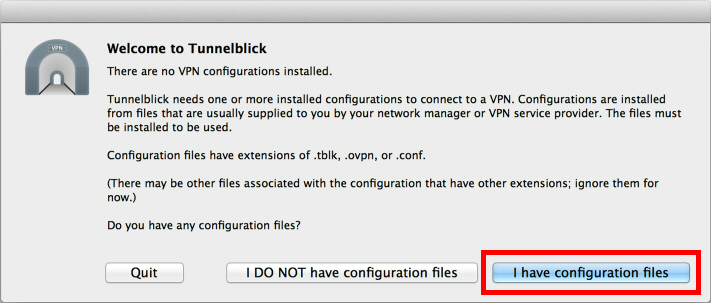
Once the installing is complete and a screen like the one
below is displayed, click on "I have configuration
files."
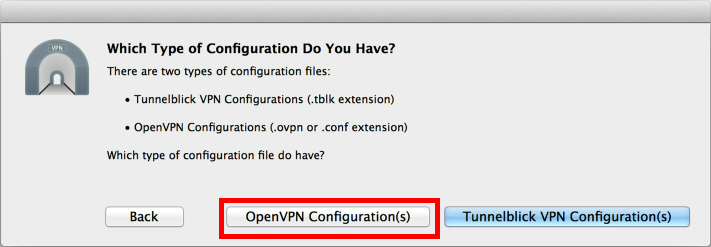
Click the "OpenVPN Configuration(s)"
button.
Click the "Create Tunnelblick VPN Configuration"
button.
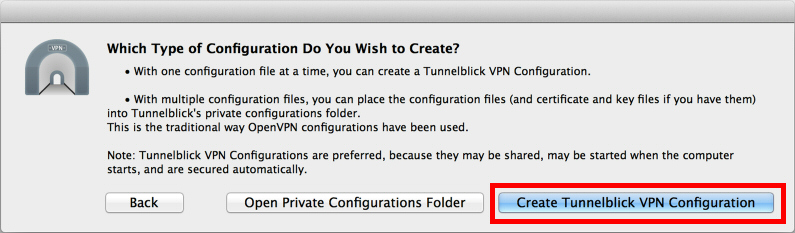
A folder named "Empty Tunnelblick VPN
Configuration" will be created on your desktop.
2. Download and install the connection setting file (.ovpn
file) (Only once the first time)
In order to use OpenVPN Client, you need to download the
connection setting file (.ovpn file).
Please click on the connection setting file (.ovpn file)
links below and download.
|
Item |
Value |
Notes |
|
Setting files using UDP |
Download the setting file:
campus-vpn-udp.ovpn |
UDP is recommended as it is fast. |
|
Setting files using TCP |
Download the setting file:
campus-vpn-tcp.ovpn |
Please give TCP a try if UDP communications cannot
be made due to restrictions in the firewall and NAT
of your home or business trip destination
environment. |
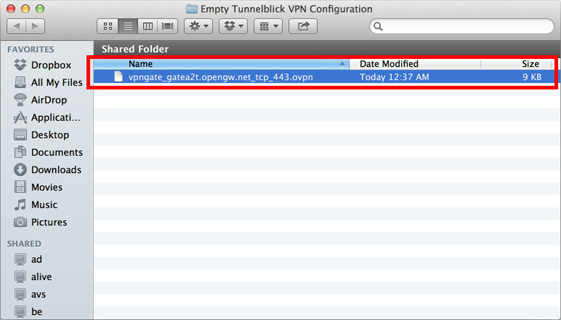
When the connection setting file (.ovpn) is saved onto
your desktop, it will become an icon as shown below.
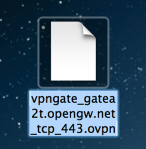
Copy or move this connection setting file (.ovpn file)
into the folder named "Empty Tunnelblick VPN
Configuration" that was just created on your
desktop.
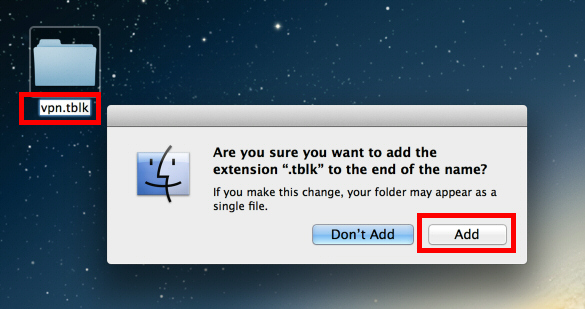
Next, change the name of the folder on your desktop named
"Empty Tunnelblick VPN Configuration" to
"Anyname.tblk."
Enter any character string into the "Anyname" area (example:
"vpn". Please give the filename extension ".tblk" at the end
of the arbitrary name.
When changing the file name, a screen like the one below
will be displayed. Please click "Add."
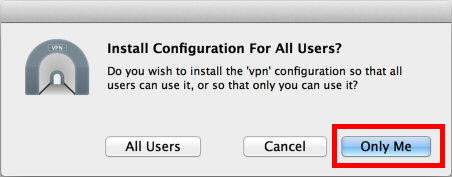
After double-clicking on the created "vpn.tblk" folder, a
screen like the one shown below will be displayed. Please
click "Only Me."
A screen to enter your user name and password will be
displayed. Here, please enter your user name and password to
login to Mac OS X.
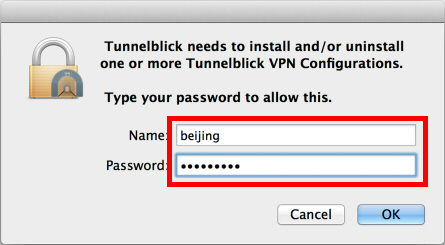
From the above operations, the OpenVPN setting connection
file (.ovpn file) has been imported to Tunnelblick.
3. VPN Connection
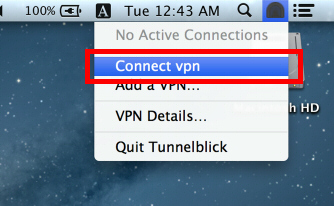
Click on the Tunnelblick icon displayed in the upper
right of the Mac OS X screen, and then click
"Connect vpn" (the "vpn" part is the connection
setting file name created beforehand) to start VPN
connections.
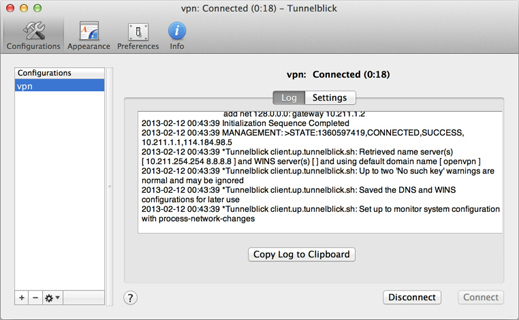
A screen like the one below will be displayed during VPN
connections.

When a screen to enter your User Name and Password is
displayed, enter the fields as follows.
|
Item |
Value |
Notes |
|
User Name (Account) |
University of Tsukuba Unified Authentication
System ID
(the 13 digit bar code number on the back
of the student/staff ID card) |
Please
click
here for information on the Unified
Authentication System. |
|
Password |
Password for the University of Tsukuba
Unified Authentication System |
Confirm that the current password and ID are
correct. |
When the VPN connection is complete, the main screen of
Tunnelblick will display "Connected."
How to set on iPhone / iPad (OpenVPN)
Here we will explain how to make a VPN connection by
installing
OpenVPN Connect, the iOS version of OpenVPN
Client by OpenVPN
Technologies, Inc. in iOS.
On this page, we will explain using the iOS 6 screen as
an example. The basic setting methods are the same as with
other versions, however, some operations are slightly
different.
The screen shots below are all taken from the English
version of iOS. When using iOS with other languages, a
different language than that of these screen shots will be
displayed. Even in such cases, by reading the following
explanations, you should be able to make the settings
easily.
- Since setting OpenVPN in iOS is difficult, we
recommend that you first try the method
using L2TP/IPsec.
In cases that L2TP/IPsec cannot be used due to reasons
such as strict firewalls etc., please try OpenVPN.
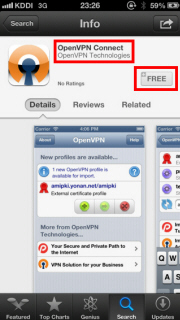
1. Install OpenVPN Connect (Only once the first time)
Activate "App Store," search for and
download the "Open VPN Connect" app.
- If you are browsing this Web page on an iPhone /
iPad, it can also be downloaded by
clicking here.
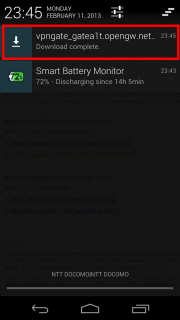
2. Download and import the OpenVPN connection setting
file (.ovpn file) (Only once the first time)
In order to use OpenVPN Client, you need to download the
connection setting file (.ovpn file).
Please click on the connection setting file (.ovpn file)
links below and download.
The setting can automatically be imported with an iPhone
or Android, by opening this page in a browser on
your smart phone with OpenVPN client installed and
then clicking on the setting file below.
|
Item |
Value |
Notes |
|
Setting files using UDP |
Download the setting file:
campus-vpn-udp.ovpn |
UDP is recommended as it is fast. |
|
Setting files using TCP |
Download the setting file:
campus-vpn-tcp.ovpn |
Please give TCP a try if UDP communications cannot
be made due to restrictions in the firewall and NAT
of your home or business trip destination
environment. |
As well, importing can also be done by downloading the .ovpn
file onto your personal computer and sending it as an
attachment to your smart phone by Email.
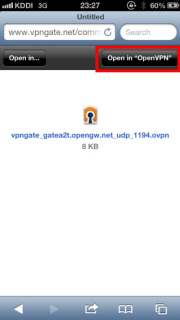
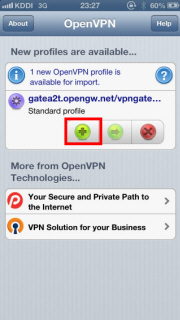
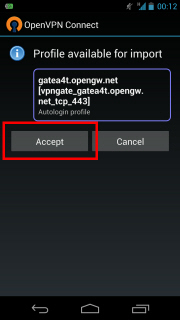
When you attempt to open an .ovpn file on iOS, OpenVPN
Connect will activate and a question will be displayed
whether you will install the .ovpn file or not.
Here, click the "+" button to install the .ovpn
file.
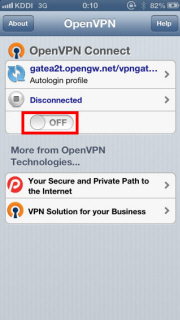
3. VPN Connection
To make a VPN connection, activate OpenVPN Connect,
select the .ovpn file that is already imported and click
"OFF" button.
s already imported and click "OFF" button.
When a screen to enter your user name and password is
displayed, enter the fields as follows.
|
Item |
Value |
Notes |
|
User Name (Account) |
University of Tsukuba Unified Authentication
System ID
(the 13 digit bar code number on the back
of the student/staff ID card) |
Please
click
here for information on the Unified
Authentication System. |
|
Password |
Password for the University of Tsukuba
Unified Authentication System |
Confirm that the current password and ID are
correct. |
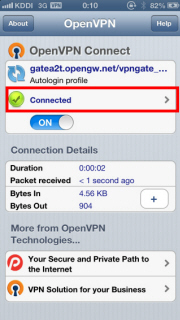
When the VPN connection has been successful,
"Connected" will be displayed as in the diagram
below.
How to set on Android (OpenVPN)
Here we will explain how to make a VPN connection by
installing
"OpenVPN Connect," the Android version of
OpenVPN Client by OpenVPN
Technologies, Inc. in iOS.
On this page, we will explain using the Android 4.x
screen as an example. The basic setting methods are the same
as with other versions, however, some operations are
slightly different. As well, there are cases when the
screens have been customized by the cell phone or tablet
manufacturer.
The screen shots below are all taken from the English
version of Android. When using Android with other languages,
a different language than that of these screen shots will be
displayed. Even in such cases, by reading the following
explanations, you should be able to make the settings
easily.
- Since setting OpenVPN in Android is difficult, we
recommend that you first try the method
using L2TP/IPsec.
In cases that L2TP/IPsec cannot be used due to reasons
such as strict firewalls etc., please try OpenVPN.
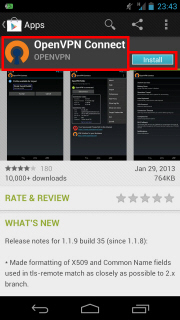
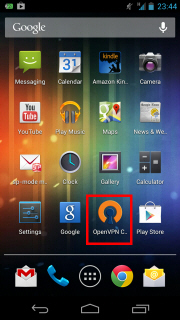
1. Install OpenVPN Connect (Only once the first time)
Activate "Google Play Store," search for
and download the "Open VPN Connect" app.
- If you are browsing this Web page on Android, it can
also be downloaded
by clicking here.
2. Download and import the OpenVPN connection setting
file (.ovpn file) (Only once the first time)
In order to use OpenVPN Client, you need to download the
connection setting file (.ovpn file).
Please click on the connection setting file (.ovpn file)
links below and download.
The setting can automatically be imported with an iPhone
or Android, by opening this page in a browser on
your smart phone with OpenVPN installed and then
clicking on the setting file below.
|
Item |
Value |
Notes |
|
Setting files using UDP |
Download the setting file:
campus-vpn-udp.ovpn |
UDP is recommended as it is fast. |
|
Setting files using TCP |
Download the setting file:
campus-vpn-tcp.ovpn |
Please give TCP a try if UDP communications cannot
be made due to restrictions in the firewall and NAT
of your home or business trip destination
environment. |
As well, importing can also be done by downloading the .ovpn
file onto your personal computer and sending it as an
attachment to your smart phone by Email.
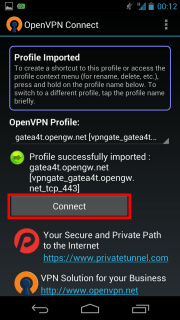
3. VPN Connection
To make a VPN connection, activate OpenVPN Connect,
select the .ovpn file that is already imported and click
"Connect."
When a screen to enter your user name and password is
displayed, enter the fields as follows.
|
Item |
Value |
Notes |
|
User Name (Account) |
University of Tsukuba Unified Authentication
System ID
(the 13 digit bar code number on the back
of the student/staff ID card) |
Please
click
here for information on the Unified
Authentication System. |
|
Password |
Password for the University of Tsukuba
Unified Authentication System |
Confirm that the current password and ID are
correct. |
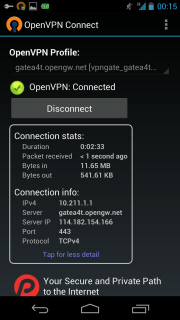
When the VPN connection has been successful,
"Connected" will be displayed as in the diagram
below.
If the VPN connection of OpenVPN fails
- There is a possibility that the firewall of your
local network above is blocking OpenVPN communication.
In this case, OpenVPN cannot be used.
In the case of Windows, please try
using SoftEther VPN
Client, and for Mac, iOS, Android, please try
L2TP/IPsec.
|